Introduction
The holiday season brings with it the joy of baking, and these mini Christmas cakes are a perfect way to spread festive cheer. They are not only adorable but also packed with rich flavors that encapsulate the spirit of Christmas. Each bite offers a delightful experience, making them ideal for sharing with family and friends.
These little cakes are perfect for holiday gatherings, gift giving, or even as delectable treats for your own indulgence. With a luscious chocolate ganache glaze, they are sophisticated yet easy to make, allowing you to showcase your baking skills without the fuss. Let's dive into the delightful world of mini Christmas cakes!
Ingredients
- 1 ½ cups all-purpose flour
The base of the cake, providing structure and texture. It combines with sugar and eggs to create the light and fluffy body of the mini cakes. - 1 cup granulated sugar
Sugar acts not only as a sweetener but also aids in moisture retention and contributes to the cake's tender crumb. - ½ cup unsalted butter, softened
Butter adds richness and flavor, while its fat content contributes to the moistness of the cakes. - 2 large eggs
Eggs provide structure and stability, acting as a binding agent that helps to trap air for a lighter texture. - 1 tsp vanilla extract
Vanilla enhances the overall flavor profile, adding warmth and a hint of sweetness to the cakes. - ½ cup milk
Milk adds moisture and helps to create a tender crumb, ensuring the cakes are not dry. - 1 tsp baking powder
An essential leavening agent that allows the cakes to rise and become fluffy during baking. - ½ tsp salt
Salt balances the sweetness and enhances the flavor of the other ingredients. - ¾ cup semisweet chocolate chips
These chocolate chips melt beautifully into the batter, infusing each cake with rich chocolate flavor. - 1 cup heavy cream
This is the main component for the ganache, providing a silky texture and the desired richness when paired with chocolate. - 8 oz semisweet chocolate, chopped
The key ingredient for a glossy ganache layer, delivering rich chocolate flavor that complements the mini cakes wonderfully. - Sprinkles or edible decorations (optional)
These add a festive touch, making the cakes visually appealing and perfect for the holiday occasion.
Directions & Preparation
Step 1: Preheat the oven to 350°F (175°C) and prepare your cake pans.
Preheating the oven ensures an even baking temperature right from the start. Greasing or lining your cake pans will help in releasing the cakes without any crumbling once they are baked.
Step 2: In a mixing bowl, cream together the softened butter and granulated sugar until light and fluffy.
Creaming the butter with sugar incorporates air into the mixture, which contributes to the cake's light texture. This step is crucial for enabling the cake to rise appropriately.
Step 3: Add the eggs one at a time, mixing well after each addition, and then stir in the vanilla extract.
Adding the eggs gradually allows for better incorporation, ensuring that the mixture becomes homogenous. The vanilla not only enhances the flavor but also brightens the overall cake.
Step 4: In a separate bowl, whisk together the flour, baking powder, and salt.
This step ensures that the leavening agent is evenly distributed throughout the flour, leading to consistent rising in every part of the cake.
Step 5: Gradually add the flour mixture to the butter mixture, alternating with milk, beginning and ending with the flour.
Alternating the dry and wet ingredients helps to maintain the emulsion and prevents overmixing, which could make the cake dense. This method keeps the cakes light and tender.
Step 6: Fold in the chocolate chips gently into the batter.
Folding in the chocolate chips instead of mixing allows you to integrate them without deflating the air you incorporated, giving you a fluffy cake with delightful chocolate pockets.
Step 7: Pour the batter evenly into prepared pans and bake for 18-20 minutes, or until a toothpick inserted into the center comes out clean.
Correct baking time is critical for achieving a moist but cooked cake. Overbaking can lead to dryness, so keep an eye on them as they bake.
Step 8: Remove the cakes from the oven and allow them to cool in the pans for 10 minutes before transferring them to wire racks.
Cooling them in the pans briefly helps to firm up the cakes, making them easier to remove without breaking. Transfer to wire racks to cool completely.
Step 9: To make the ganache, heat the heavy cream in a small saucepan until it begins to simmer, then pour it over the chopped chocolate in a bowl.
Heating the cream properly is key; it should be hot enough to melt the chocolate but not boiling. This step creates a silky and smooth ganache.
Step 10: Let the mixture sit for a few minutes, then stir gently until the chocolate is fully melted and combined with the cream.
Patience during this stage is crucial as stirring too vigorously can introduce air bubbles. A smooth ganache is critical for that beautiful finish on your cakes.
Step 11: Once the cakes are completely cooled, drizzle the ganache over each mini cake, letting it drip down the sides.
This step allows for a beautiful presentation with the ganache giving a luxurious touch. The slight dripping also enhances the visual appeal, making them even more festive.
Step 12: If desired, top the cakes with sprinkles or edible decorations while the ganache is still soft.
Decorating while the ganache is still warm ensures that the toppings stick properly. This adds that extra festive flair that makes these cakes perfect for celebrations.

Perfectly Proportioned Delight
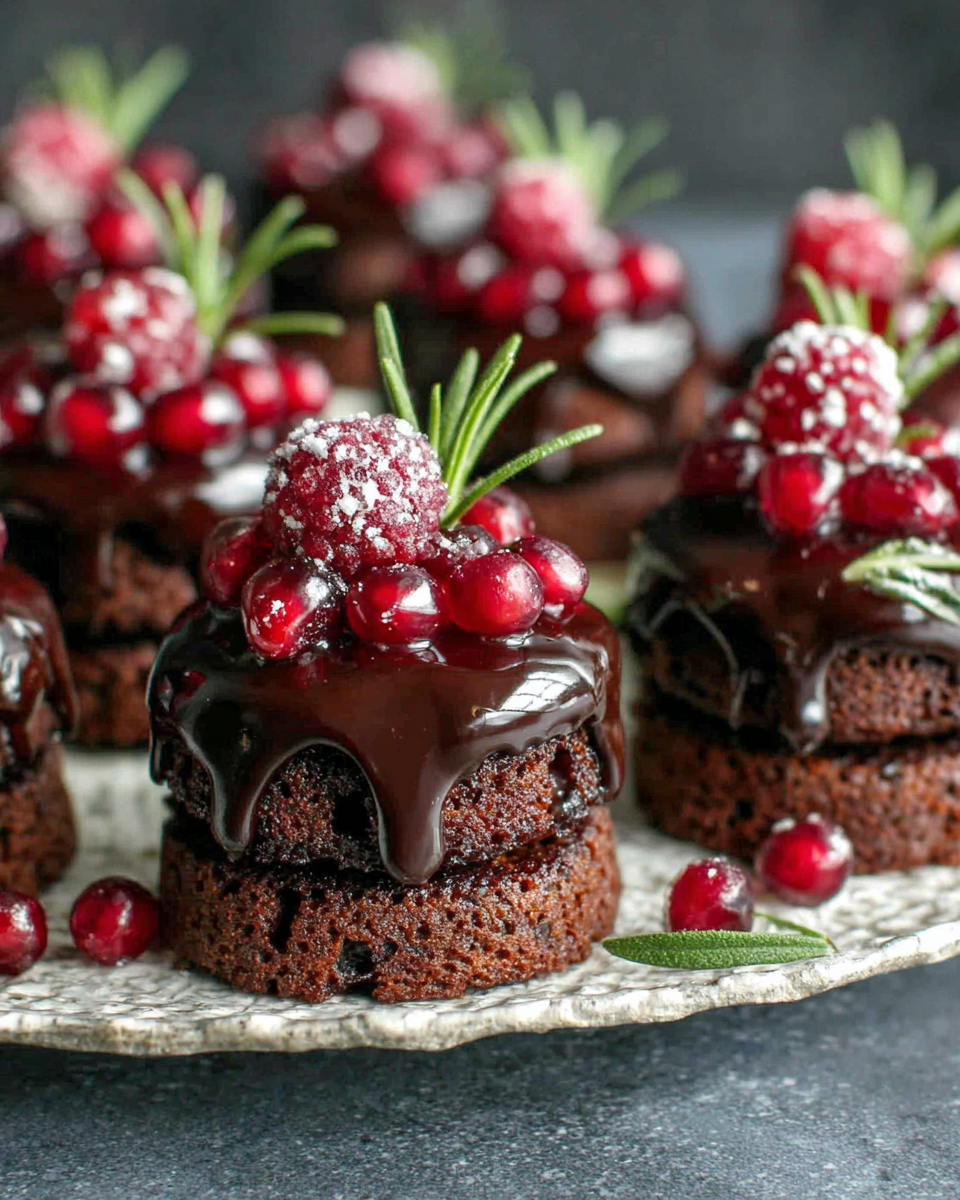
These mini Christmas cakes are not only charming but also the perfect portion for individual servings. Their small size makes them an ideal treat at holiday gatherings, encouraging guests to sample different flavors without feeling overly indulgent. The distinct layers offer a beautiful presentation while encapsulating the essence of traditional fruitcake in a modern shape.
Chocolate Ganache: A Touch of Elegance
The ganache serves as the crowning glory of these mini cakes, transforming them from delightful to decadent. By using high-quality semisweet chocolate, the ganache achieves a silky finish that contrasts beautifully with the soft cake. This rich layer not only adds flavor but also enriches the overall experience, making each bite a celebration.
Decoration: Elevate Your Festive Cakes
The finishing touches to your cakes can elevate their visual appeal significantly. Using colorful sprinkles or edible gold leaf not only adds a touch of whimsy but also emphasizes the holiday spirit. Personalizing each cake allows for creativity and enjoyment, making them look as festive as they taste.
FAQs
What can I do if my ganache is too thick?
If your ganache is too thick, you can gently reheat it in the microwave or over a double boiler, adding a little more cream until it reaches your desired consistency.
How can I enhance the flavor of my mini cakes?
You can enhance the flavor by adding spices like cinnamon or nutmeg to the batter. Incorporating zest from oranges or lemons adds a refreshing note that's perfect for the holidays.
What if my cakes are domed instead of flat?
If your cakes are domed, it could be due to oven temperature being too high. Ensure your oven is calibrated correctly and consider rotating your pan halfway through baking.
Can I substitute different types of chocolate in the ganache?
Yes, you can use milk or dark chocolate if preferred, but remember that milk chocolate will sweeten the ganache while dark chocolate will create a richer flavor.
What should I do if my mini cakes are too dry?
If your mini cakes turn out dry, it's possible they were overbaked. Monitor the baking time closely next time and use a toothpick to check a few minutes before the recommended time.
Can I use gluten-free flour in this recipe?
Yes, you can try substituting with a gluten-free flour blend; however, this might slightly alter the texture of the cakes.
Conclusion
Creating these festive mini Christmas cakes with ganache will not only fill your home with delicious aromas but also provide a fantastic centerpiece for your holiday celebrations. Their charming size and rich flavors make them a must-try for any holiday baker.
As your guests enjoy these treats, they'll surely appreciate the effort you've put into making something so delightful. So gather your ingredients and get ready to create these sweet bites of joy that encapsulate the essence of the holiday season.
Recipe Card
Notes
Additional serving suggestions: pair with a crisp salad, garlic bread, or roasted seasonal vegetables for balance.
For make-ahead, prep components separately and assemble just before heating to preserve texture.
Taste and adjust with acid (lemon/vinegar) and salt right at the end to wake up flavors.