Introduction
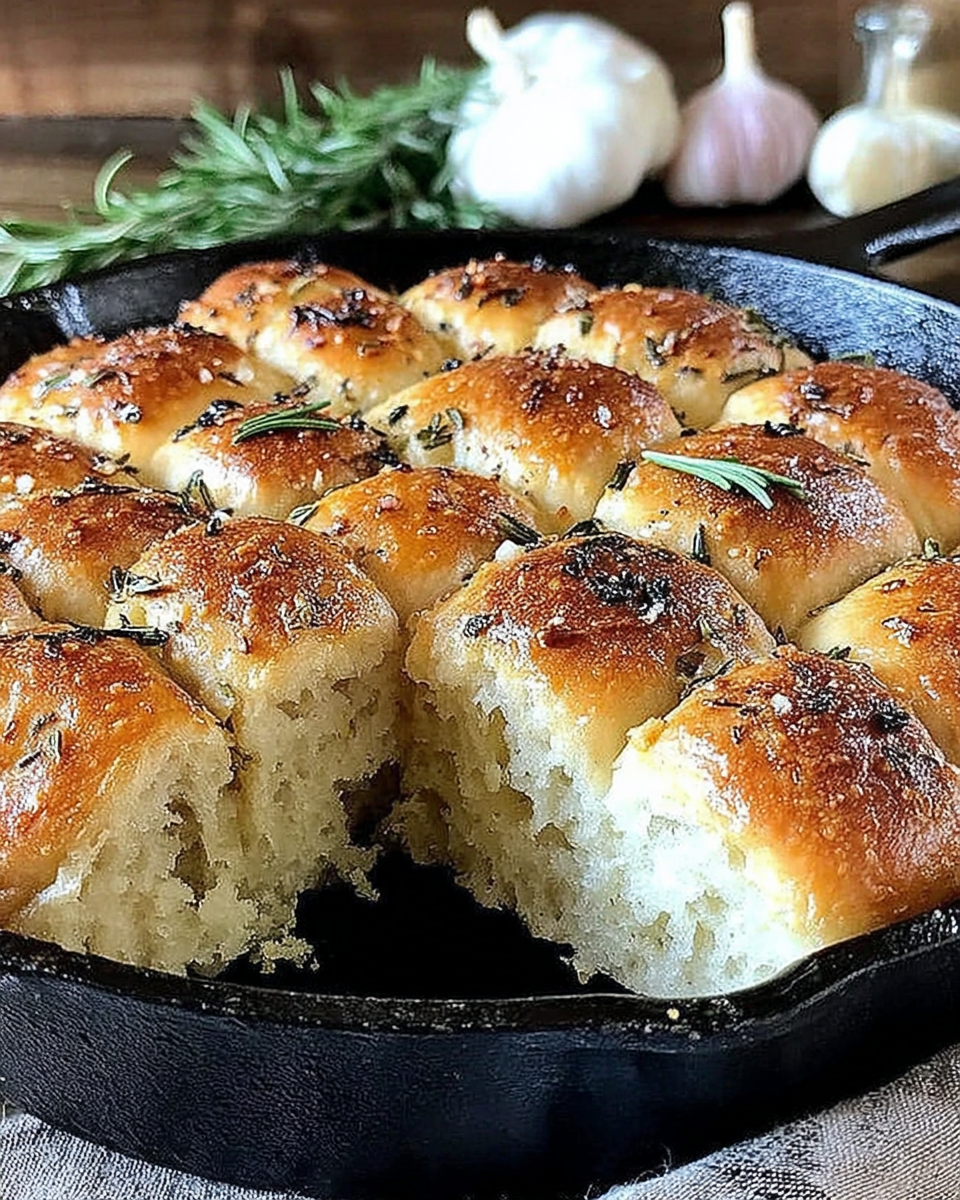
Imagine the aroma of freshly baked bread wafting through your home, infused with the savory scents of garlic and rosemary. This Rustic Garlic Rosemary Skillet Bread brings that dream to life with minimal effort and maximum flavor.
Perfect for any occasion, this easy homemade recipe combines simple ingredients that you likely have on hand. The result is a crusty, golden bread that’s soft and fluffy on the inside, making it the ideal companion for soups, stews, or simply enjoyed warm with a drizzle of olive oil.
Ingredients
- 3 cups all-purpose flour
All-purpose flour forms the backbone of this bread, providing the necessary structure and chewiness. It allows for the perfect balance between a crusty exterior and a soft interior. - 1 teaspoon salt
Salt enhances the flavor of the bread and helps in strengthening gluten, which contributes to the bread's overall texture. It’s essential for a well-rounded taste. - 1 packet (2 ¼ teaspoons) instant yeast
Instant yeast acts as the leavening agent, helping the bread rise quickly without the need for lengthy fermentation. It ensures that the dough is light and airy. - 1 tablespoon sugar
Sugar not only provides a hint of sweetness but also feeds the yeast, promoting fermentation and aiding in browning the crust during baking for a more appealing finish. - 1 cup warm water (about 110°F)
Warm water activates the yeast, setting off the fermentation process. It’s important that the water is at the right temperature to stimulate yeast activity without killing it. - 3 cloves garlic, minced
Minced garlic infuses the dough with a rich, savory flavor. Garlic also adds aromatic properties that enhance the overall taste of the bread. - 2 tablespoons fresh rosemary, chopped
Fresh rosemary complements the garlic beautifully, offering a fragrant herbal note. It brightens the flavor profile and makes the bread distinctive. - 2 tablespoons olive oil
Olive oil contributes moisture and richness to the bread while encouraging a golden crust. It also adds a subtle fruity flavor that rounds out the taste.
Directions & Preparation
Step 1: Combine dry ingredients.
Start by whisking together the flour, salt, sugar, and instant yeast in a large mixing bowl. This step is crucial as it evenly distributes the yeast and salt, ensuring consistent fermentation throughout the dough. By mixing these dry ingredients first, you prepare them to accept the wet ingredients without clumping, leading to an evenly mixed dough.
Step 2: Incorporate wet ingredients.
Create a well in the center of the dry ingredients and pour in the warm water and olive oil. Using a sturdy spoon or your hands, mix until the dough begins to form. This step is key as it activates the yeast, allowing it to start fermenting and creating bubbles in the dough. Be careful not to overmix; a shaggy texture indicates you’re on the right path.
Step 3: Add garlic and rosemary.
Now, fold in the minced garlic and chopped rosemary into the dough. This addition not only elevates the flavor but also infuses the bread with delightful aromas. Make sure the herbs are evenly distributed throughout the dough for consistent flavor in every bite.
Step 4: Knead the dough.
Transfer the dough to a lightly floured surface and knead for about 8 to 10 minutes until it becomes smooth and elastic. Kneading is essential as it develops the gluten structure, creating the desired texture of the bread. If the dough sticks to your hands, lightly flour your fingers or the surface to prevent sticking.
Step 5: First rise.
Place the kneaded dough in a greased bowl, covering it with a clean kitchen towel. Allow it to rise in a warm place for about 1 hour or until it has doubled in size. This fermentation step is critical, as it helps develop the flavors and texture in the bread, making it airy and light. An ideal rising environment is warm and draft-free.
Step 6: Shape the dough.
After the dough has risen, punch it down gently to release any trapped air. Turn it out onto a floured surface and shape it into a ball or an oval. This shaping process prepares the dough for its second rise and ultimately helps create a beautiful loaf. Ensure not to handle it too roughly, as gentle shaping retains some of the gas that contributes to a fluffy crumb.
Step 7: Second rise.
Transfer the shaped dough back to the bowl or a skillet. Cover it again and let it rise for another 30 minutes. This second rise is crucial for achieving a good texture. During this time, the dough continues to develop flavor and grow in size.
Step 8: Preheat the skillet.
As the dough rises, preheat your skillet over medium-low heat with a little olive oil to prevent sticking. This initial heating allows for better crust formation once the dough is placed in the skillet. Preheating also ensures that the sides of the bread begin to bake immediately, contributing to a better rise and crust.
Step 9: Cook the bread.
Carefully place the risen dough into the hot skillet. Cover it with a lid and let it cook for about 20-25 minutes, checking occasionally to ensure it doesn’t burn. This method mimics the environment of an oven while allowing for a perfectly golden-brown crust. If necessary, adjust the heat to maintain a steady temperature.
Step 10: Flip and brown.
Once the bottom is golden, carefully flip the bread using a flat spatula or plate. Cover again to cook the other side for an additional 10-15 minutes. Flipping is important to achieve a uniform color and to ensure that both sides are cooked through. Monitor browning closely to avoid burning.
Step 11: Cool and serve.
Once fully cooked, transfer the bread to a wire rack to cool for at least 10 minutes before slicing. This cooling period allows the crumb to set properly, ensuring that each slice holds well when served. Enjoy the bread warm, perhaps with a drizzle of olive oil or alongside your favorite dipping sauce.

Mastering the Aroma of Garlic and Rosemary
The combination of garlic and rosemary elevates this bread to new heights. Ensuring you use fresh garlic and rosemary plays a significant role in imparting vibrant flavors. The key is to chop them finely to release their essential oils fully, allowing their aromatic qualities to infuse the dough beautifully. Don’t hesitate to adjust the amounts to suit your personal taste; a little extra garlic can create a delightful flavor burst!
The Secret to a Perfect Crust
Achieving a beautiful, rustic crust is all about temperature control. Preheating your skillet correctly is vital for creating that golden exterior. For an extra crunchy crust, consider adding a splash of water to the skillet before covering, which will create steam and enhance the crust's texture. Remember, a well-cooked crust not only enhances the aesthetic appeal but also contributes to the overall eating experience.
Ideas for Serving and Pairing
Rustic Garlic Rosemary Skillet Bread pairs wonderfully with a variety of dishes. Serve it warm as a side to your favorite soup or stew, or slice it up for a rustic sandwich. It can also stand alone, dipped in high-quality olive oil or balsamic vinegar. Experiment with toppings such as sea salt flakes or an herbed butter blend. This bread’s versatility makes it a delightful addition to any meal.
FAQs
What can I do if my bread is too dense?
If your bread turns out dense, it could be due to insufficient rising time or not enough kneading. Ensure to let your dough rise until it has doubled in size, and properly knead to develop gluten.
Can I substitute dried herbs for fresh ones?
Yes, you can use dried rosemary in place of fresh, but use only about a third of the amount, as dried herbs are more concentrated. Fresh herbs provide a brighter flavor that’s hard to replicate.
What should I do if my bread has a bland taste?
If your bread lacks flavor, consider increasing the amount of salt or spices. Adding a sprinkle of sea salt just before cooking can also enhance the overall taste.
How do I know when the bread is fully cooked?
The bread is fully cooked when it sounds hollow when tapped on the bottom. You can also use a toothpick to check for doneness; it should come out clean.
What if my dough is too sticky?
If your dough is too sticky, add a little more flour, a tablespoon at a time, until it reaches a manageable consistency. However, be cautious not to add too much, as it can affect texture.
Can I use whole wheat flour instead?
Whole wheat flour can be used, but it will yield a denser loaf. Consider using half whole wheat and half all-purpose flour for a healthier yet lighter texture.
What if the crust is too tough?
If the crust becomes too tough, it could be due to overcooking. Monitor the cooking time closely and reduce it slightly if necessary. Additionally, ensure that you're using enough oil in the skillet.
Conclusion
Rustic Garlic Rosemary Skillet Bread is a rewarding project that fills your kitchen with delightful aromas and provides a delicious accompaniment to any meal. As you slice into the golden crust, the soft, fluffy interior will beckon for a taste.
This recipe not only showcases the simplicity of homemade bread but also invites you to experiment with flavors. Whether you enjoy it fresh from the skillet or toasted with toppings, this bread will undoubtedly become a cherished staple in your home.
Recipe Card
Notes
Additional serving suggestions: pair with a crisp salad, garlic bread, or roasted seasonal vegetables for balance.
For make-ahead, prep components separately and assemble just before heating to preserve texture.
Taste and adjust with acid (lemon/vinegar) and salt right at the end to wake up flavors.